Low Cost Helical Thread Repair in Tight Space
It was suppose to be a quick job of re-tightening the exhaust. Your heart just sinks as the nut suddenly lets go before reaching the proper torque. After that, the nut just spins freely.
At this point, there are several choices. The fastest way to fix the problem is to use Prematex's Strip Thread Repair. Unforturnately, the epoxy used in the kit is only good to 149 C. The exhaust manifold could get that hot. The repair could become a weak link in reliability. The other chioce is to use a insert. A quick check on price for a 10mm-1.25 helical insert repair kit cost $42.00 at McMaster-Carr. Other places have simlar prices. That seems a little high for a thread repair kit. However, there is a cheaper way. If you buy the tap and the insert separtely, the insert tap is only $18.69. The inserts are $.90 each. The kit includes the tap, insert, installer, and drill bit. The only thing you are missing without the kit is the installation tool and the drill bit. For almost half the cost, I went with the items separately.
The second problem was that the thread repair was in a tight space. There was no room to put a drill in there. The last thing I want was to take the cylinder head off.
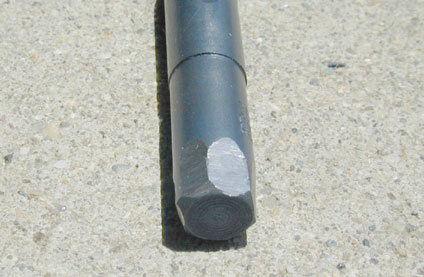
First order of business was to grind a hex shape on the end of the bit.
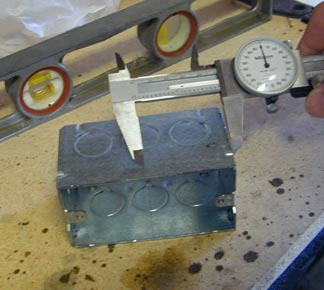
More preparation work. Need to make sure that the hole is drilled straight. For an acceptable accuracy, I used an electrical box with shart straight sides. Measured in from two straight edges on top and bottom of the box, then drilled hole on top and bottom side of the box.
More preparation work...
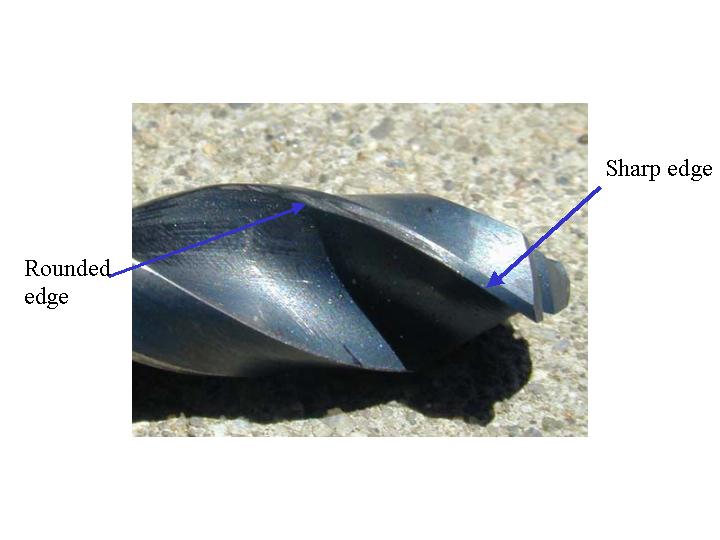
I was concerned that hand drilling the hole with a rachet would cause the outside of the hole to be larger as the bit wobbles while drilling deeper into the hole. The problem was that the flute of the bit have sharp edges, and can enlarge the hole as you are drilling by hand. I used a grinder and file to round off the edges of the drill bit so that only the lead in portion of the drill is sharp to drill the hole. With the rounded edges, the hole ended up being quite straight. It was not too pretty because I was hand drilling the hole, but at least it was not a cone shaped hole. You want a tight hole so that after the repair, the thread would not be too loose, and loose strength.

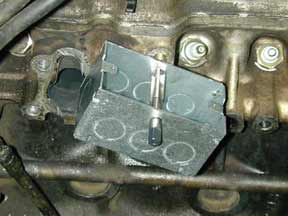
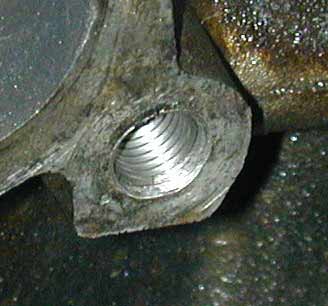
Using a rachet, and a 9mm socket, the hole can be hand drilled out to size. This takes much less space than an electric drill. Since not much material will be removed, it was not too difficult to hand drill out the hole. I used three different size drill to slowly go up in hole size just to be on the safe side. As shown in the picture, there would have been no room for a drill. The box worked much better than doing it by eye.
After drilling, the box worked pretty good as a guide for the tap. A new box should be modified for the tap, but the existing box with the hole just a little too big was ok for this application. The tap is threaded into the box on the side close to the engine, and guides the tap into the hole. I used a center punch to press on the dimple on the end of the tap, and apply forward pressure on the tap while turning. That worked great. You need four hands to do this correctly, but can be done with one person.
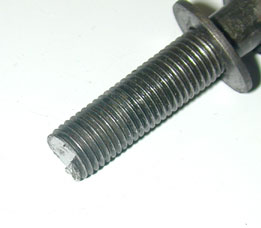
Next step was to use a 10mm-1.25 screw, and grind away about a third of the last thread of the screw. The remaining protrusion is what will screw the insert into the hole.
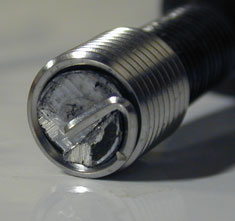
Note how the notch on the end of the bolt engages the insert. When placing the insert onto the screw, make sure that the notch engage the end of the insert securely, and does not slip. Modifiy the notch if necessary so that the notch catches onto the end of the insert. If the notch slips, the bolt can thread one more turn onto the insert. That would cause the last coil of the insert to be distorted. The tang is removed after the insert is screwed into the hole. The rest is just screwing the insert into the tapped hole using the bolt. The insert should be 1/2 to 1 thread below the surface of the tapped hole. The tang could be broken off by pressing on it with the end of a pen.
Repair finished. Saved $17.00 by buying parts separtely.
Future changes:
Next time I do this again, I will use a square tubing rather than an electrical box. The box was somewhat flimsy.